
3. Understanding the Store
Explore the Store, discover modules, and learn how to install or uninstall features in your edition.
The Store is where you can browse, install, and manage additional features for your editions.
When you create an edition from scratch in njuko, it already includes all of the core functionality needed to build a simple registration journey. For straightforward events, these built-in tools may be all you need.
However, njuko is modular. This means you can expand your edition with additional functionalities called modules.
Modules allow you to customise and enhance your edition based on your specific event requirements.
Some modules are free, while others have an additional cost.
To put it simply: you only pay for the features you need.
1. What is the Store?
The Store is njuko’s feature marketplace.
It allows you to:
-
Explore available modules
-
Read setup and configuration guides
-
Install new functionalities into your edition
-
Manage existing modules
There are currently 600+ modules available, with new ones regularly added.
Modules cover a wide range of functionality, including:
-
Registration flow tools
-
Team and group features
-
Fundraising tools
-
Waiting lists
-
Participant transfers
-
On-site tools
-
Advanced competition settings
-
Integrations and partner tools
-
Customisation and branding options
This modular approach keeps editions lightweight and flexible.
💡 Tip
You do not need to install everything. Start with the features you need and add more as your event setup evolves.
2. How to access the Store
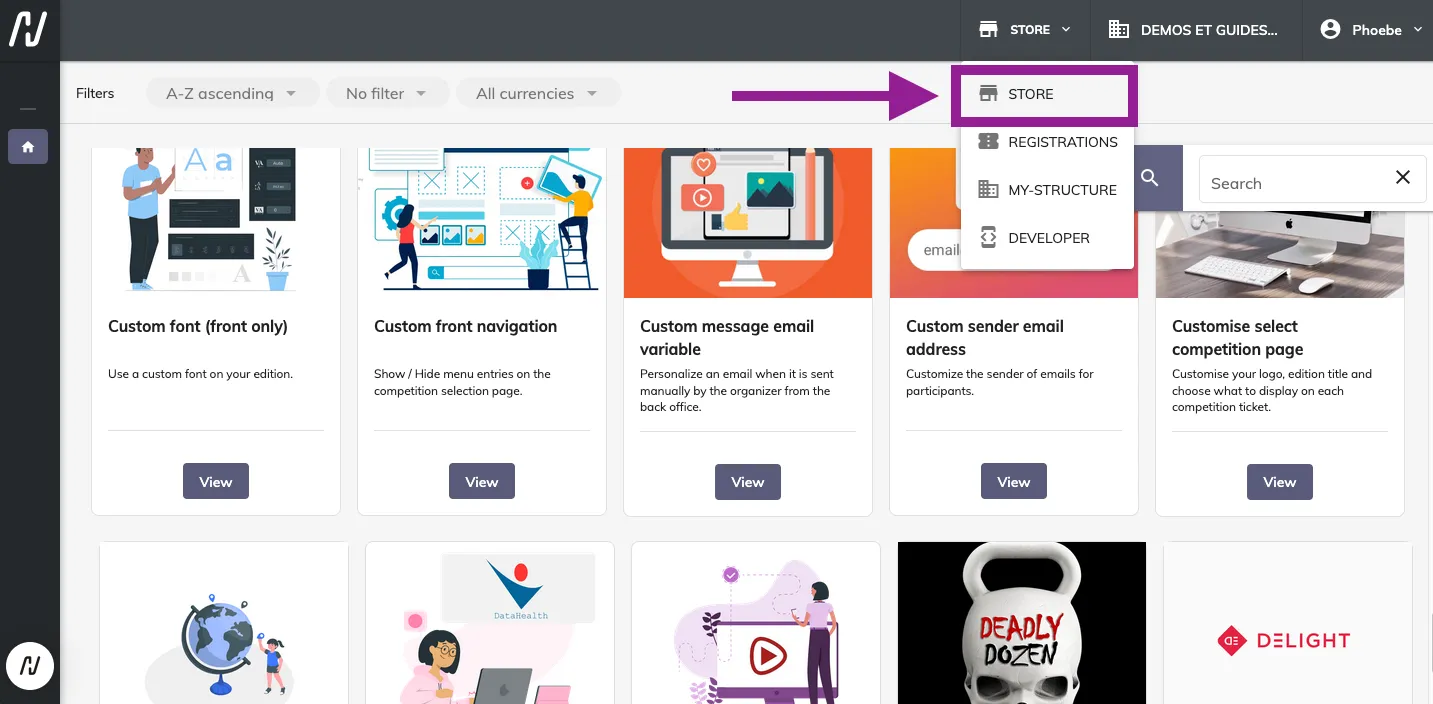
To access the Store:
Use the Applications menu in the top navigation bar and click:
Store
You will then arrive in the Store application.
This is where you can browse all available modules.
3. Navigating the Store
The Store includes several tools to help you find the right modules.
These include:
-
Filters
-
Search bar
-
Module pages
3.1 Using filters
Filters appear in the top left of the Store.
They allow you to sort modules by criteria such as:
-
Edition
-
Currency
-
Other available filters
Filtering by edition is often the most useful option.
When you select an edition:
-
The Store automatically loads the edition currency
-
You can immediately see which modules are already installed
This makes it easier to manage existing features and avoid duplicates.
💡 Tip
Always filter by your edition before installing or uninstalling modules so you are working in the correct environment.
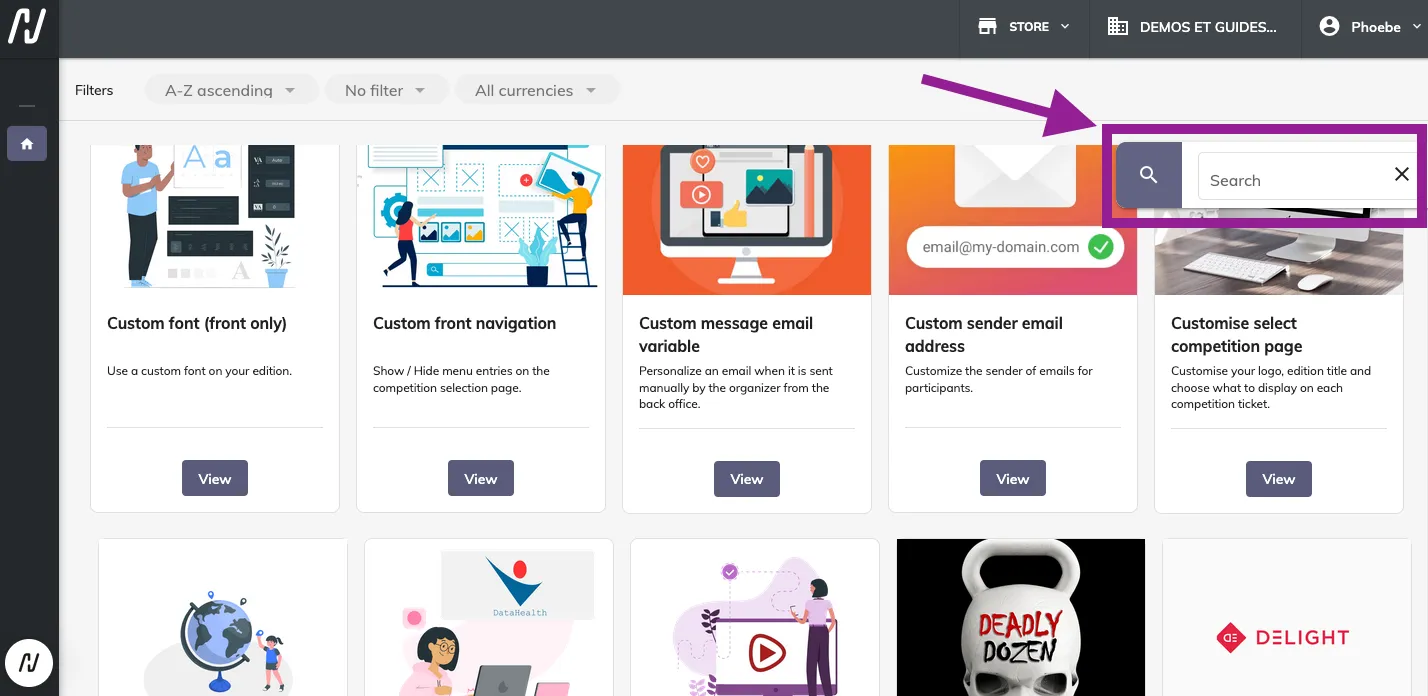
3.2 Using the search bar
The search bar appears in the top right of the Store.
Use it to search for:
-
Keywords
-
Feature types
-
Specific module names
Examples:
-
Teams
-
Email
-
Waiting list
-
Transfer
This is often the fastest way to locate a module.
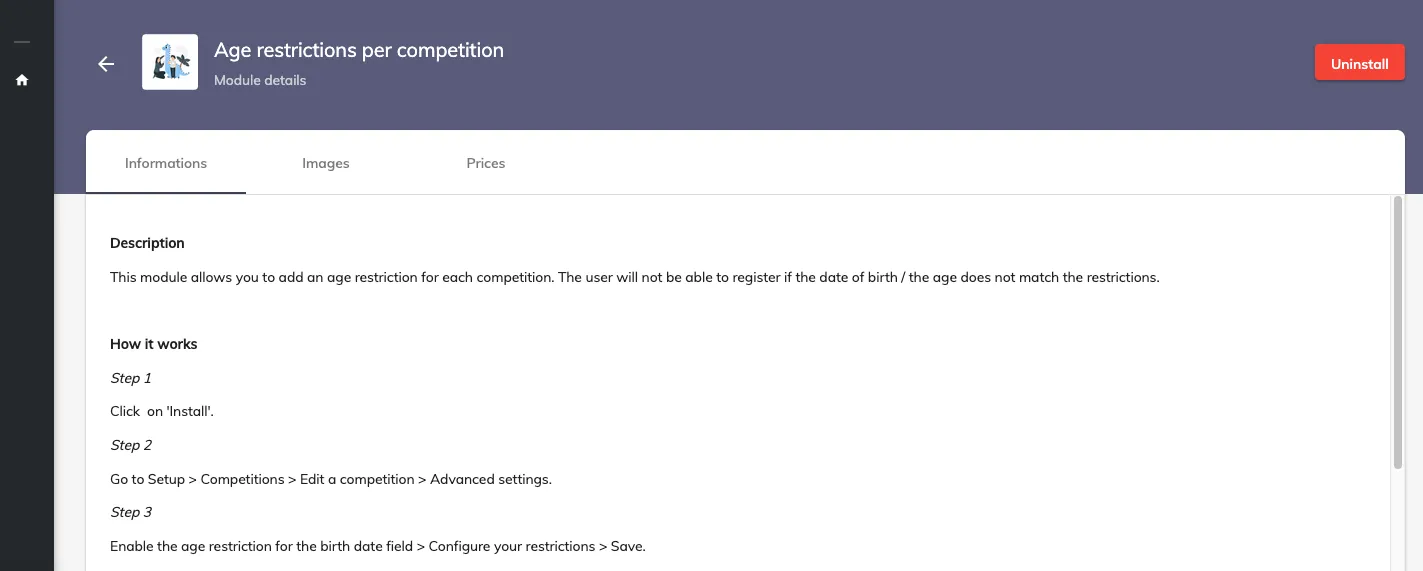
4. Understanding module pages
Once you find a module, click:
-
The module image
or -
The module title
This opens the module page.
Each module page includes:
-
A feature description
-
Configuration instructions
-
Step-by-step setup guidance
-
Pricing information (if applicable)
-
Sometimes additional notes or documentation
-
Often a link to a help centre article with video guides
Take time to review the module description before installing it.
This will help you understand:
-
What the module does
-
Whether it matches your use case
-
Any configuration steps required afterwards
5. Installing a module
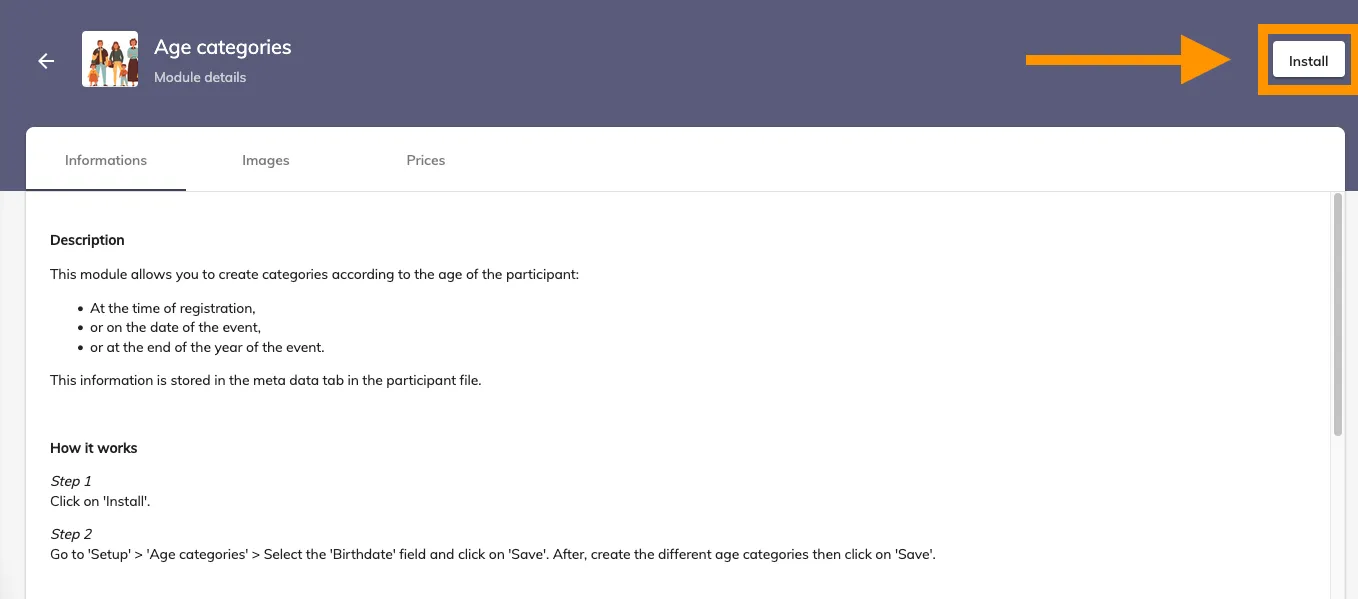
Once you have reviewed the module page:
Click:
Install
If the module has a cost, pricing will be displayed before installation.
You may be asked to confirm acceptance of the fee before proceeding.
Once installed:
-
The module becomes available in your edition
-
Related configuration options will appear in the relevant setup areas
⚠️ Important
Installing a module does not always activate it automatically.
Most modules require configuration after installation. Always follow the setup instructions provided on the module page.
6. Uninstalling a module
If you no longer need a module:
-
Filter the Store by your edition
-
Open the module page
-
Click:
Uninstall
The module will then be removed from the edition.
⚠️ Important
Modules can only be uninstalled while the edition is still in draft mode.
Once an edition has been set live:
-
Modules can still be added
-
But they cannot be removed
This helps protect live configurations and participant registrations.
7. Best practices
To manage modules efficiently, we recommend:
-
Filtering by edition before making changes
-
Reading module documentation before installation
-
Testing new modules before opening registrations
-
Installing only the features you need
-
Reviewing module pricing where applicable
-
Keeping draft editions clean and organised
Because njuko is modular, your setup can evolve over time without unnecessary complexity.
8. Video guides
8.1 Navigating the Store and installing or uninstalling modules
Related articles
👉 Introduction to the njuko ecosystem
The Store is one of the most powerful parts of njuko, allowing you to build an edition that matches your exact operational and participant needs.
If you are unsure which modules are right for your event, our team will be happy to help.