
4. Create your first edition
Create your first edition and begin configuring your registration experience.
Creating an edition is the first operational step in building your event within njuko.
An edition contains everything related to a specific occurrence of your event, including competitions, forms, participant registrations, emails, workflows, and settings.
This guide walks you through the key steps to create your first edition and prepare it for launch.
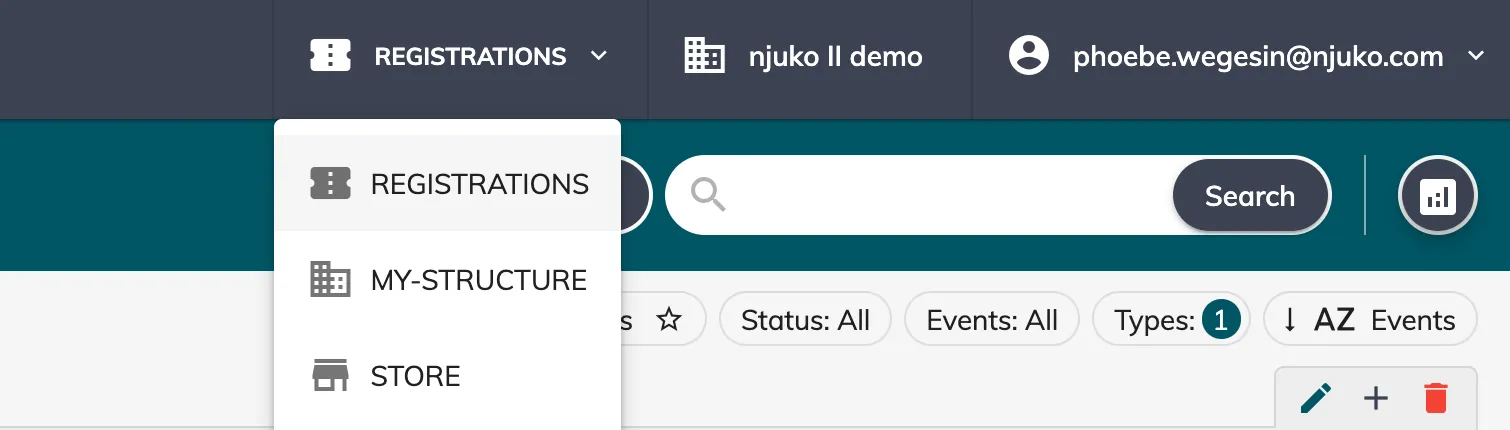
1. Access the Registrations application
From the top navigation menu, click:
Registrations
This is where all of your events and editions are created and managed.
2. Create an event or add an edition
There are two ways to begin:
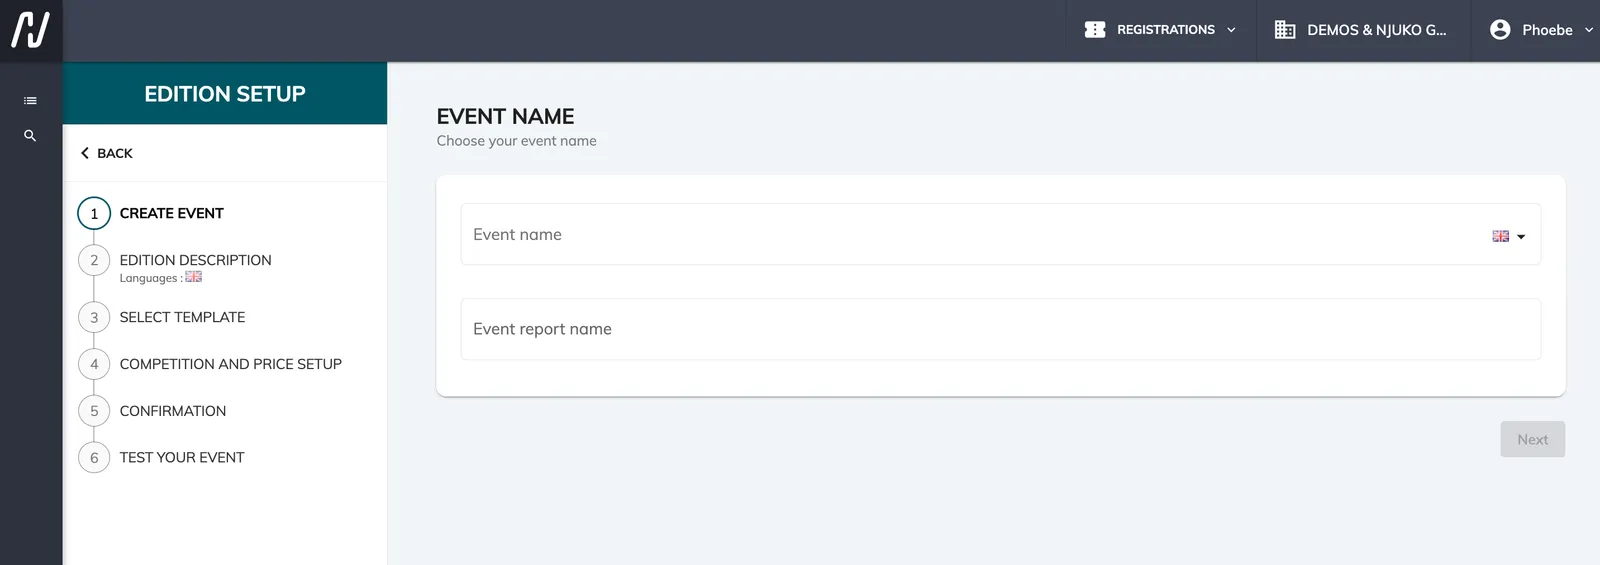
2.1 Create a new event
Click:
Add an event
This creates a brand new event container in which you can create your first edition.
Examples:
-
Copenhagen Half Marathon
-
Mountain Trail Series
-
Charity Fun Run
Understand the difference between an event and an edition.
2.2 Add an edition to an existing event
If your event already exists, click the:
+ button
inside the existing event.
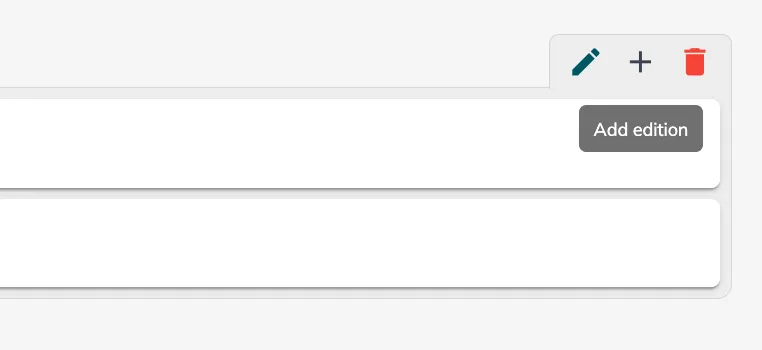
This allows you to create a new edition within that event.
Example:
Event: Copenhagen Half Marathon
Editions:
-
Copenhagen Half Marathon 2025
-
Copenhagen Half Marathon 2026
💡 Tip
Events act as containers, while editions usually represent specific yearly or date-based occurrences.
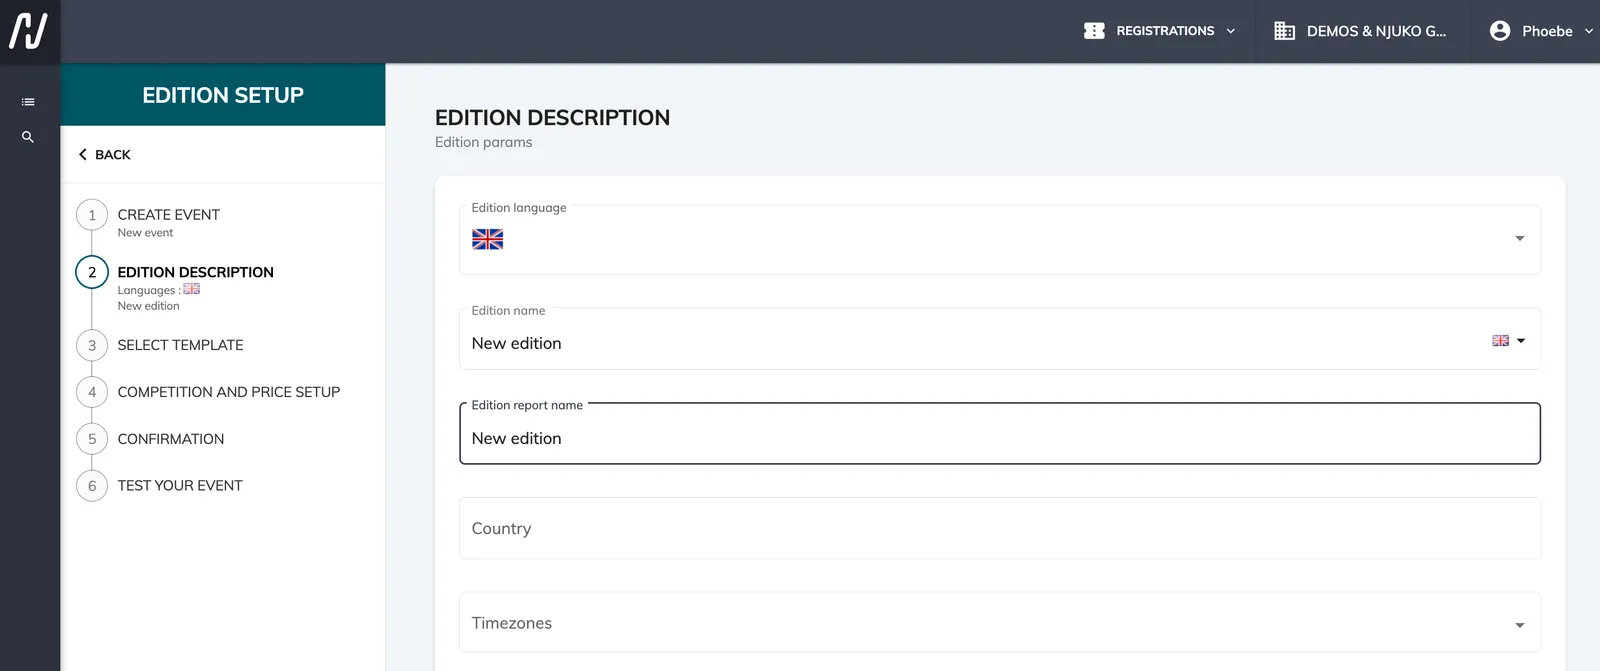
3. Complete the edition setup information
In steps 1 and 2, you will then be asked to complete the basic setup information for your event and edition.
This includes core information such as:
-
Event name
-
Edition language
-
Edition name
-
Country
-
Date
-
Timezone
-
Currency
-
Sport
These settings create the framework for your edition.
4. Choose a template or start from scratch
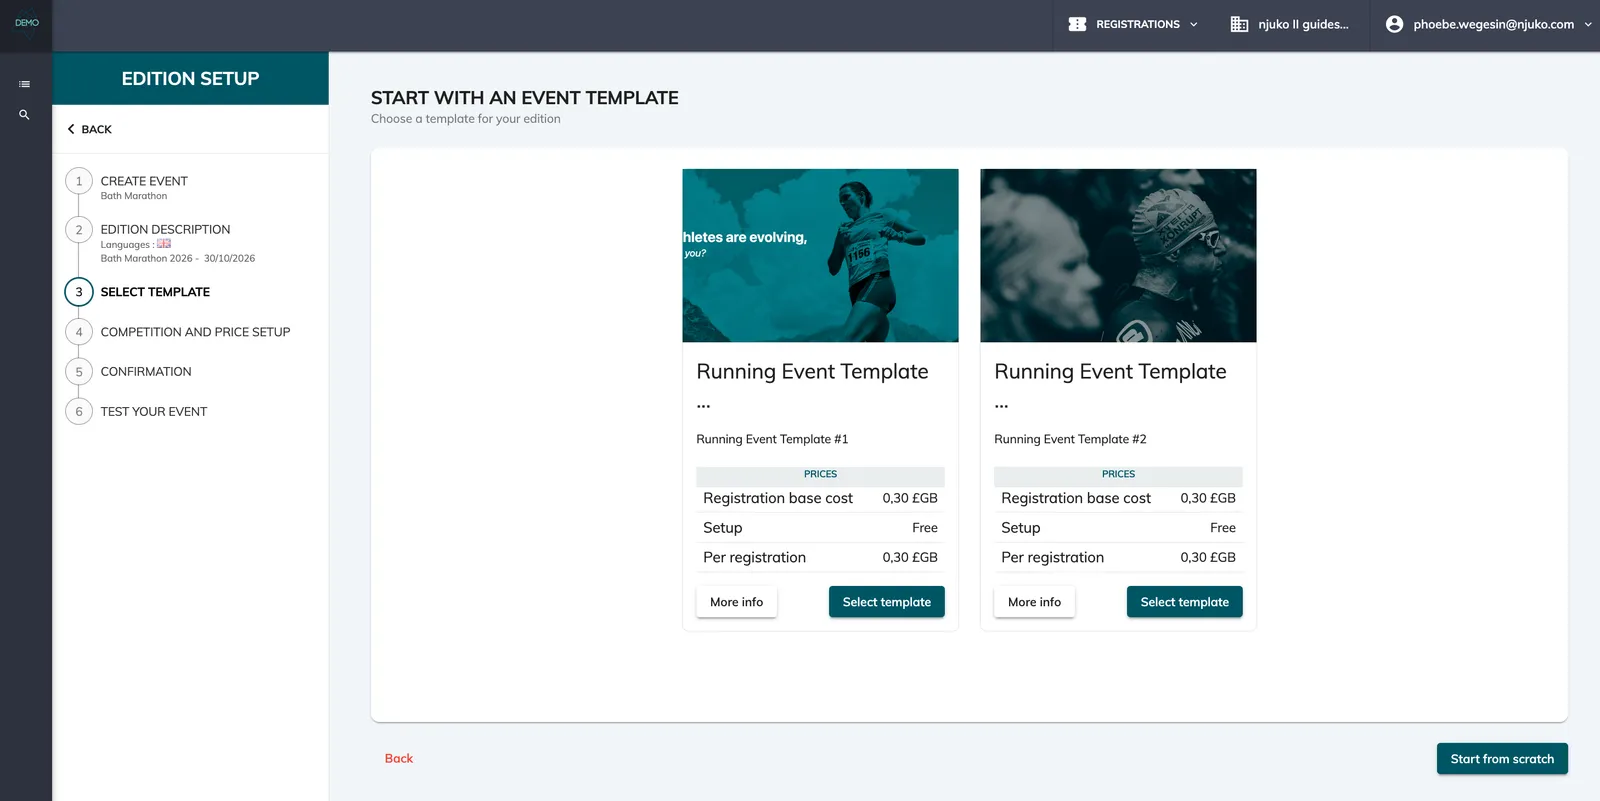
Depending on your structure setup, you may have templates available.
In step 3, you can either:
4.1 Use a template
Templates can help speed up setup by pre-configuring certain elements of your edition.
This may include:
-
Competitions
-
Forms
-
Workflows
-
Branding
-
Common settings
4.2 Start from scratch
If no template is available — or you prefer full control — you can create your edition from scratch.
This is often useful for:
-
New event concepts
-
Custom registration flows
-
Unique participant experiences
5. Create your first competition
Every edition must contain at least one competition and one price.
Competitions allow you to structure the different experiences within your event.
Examples may include:
-
5K
-
10K
-
Marathon
-
Relay
-
Kids race
-
Team challenge
An edition can contain multiple competitions, each with its own configuration, pricing, and registration rules.
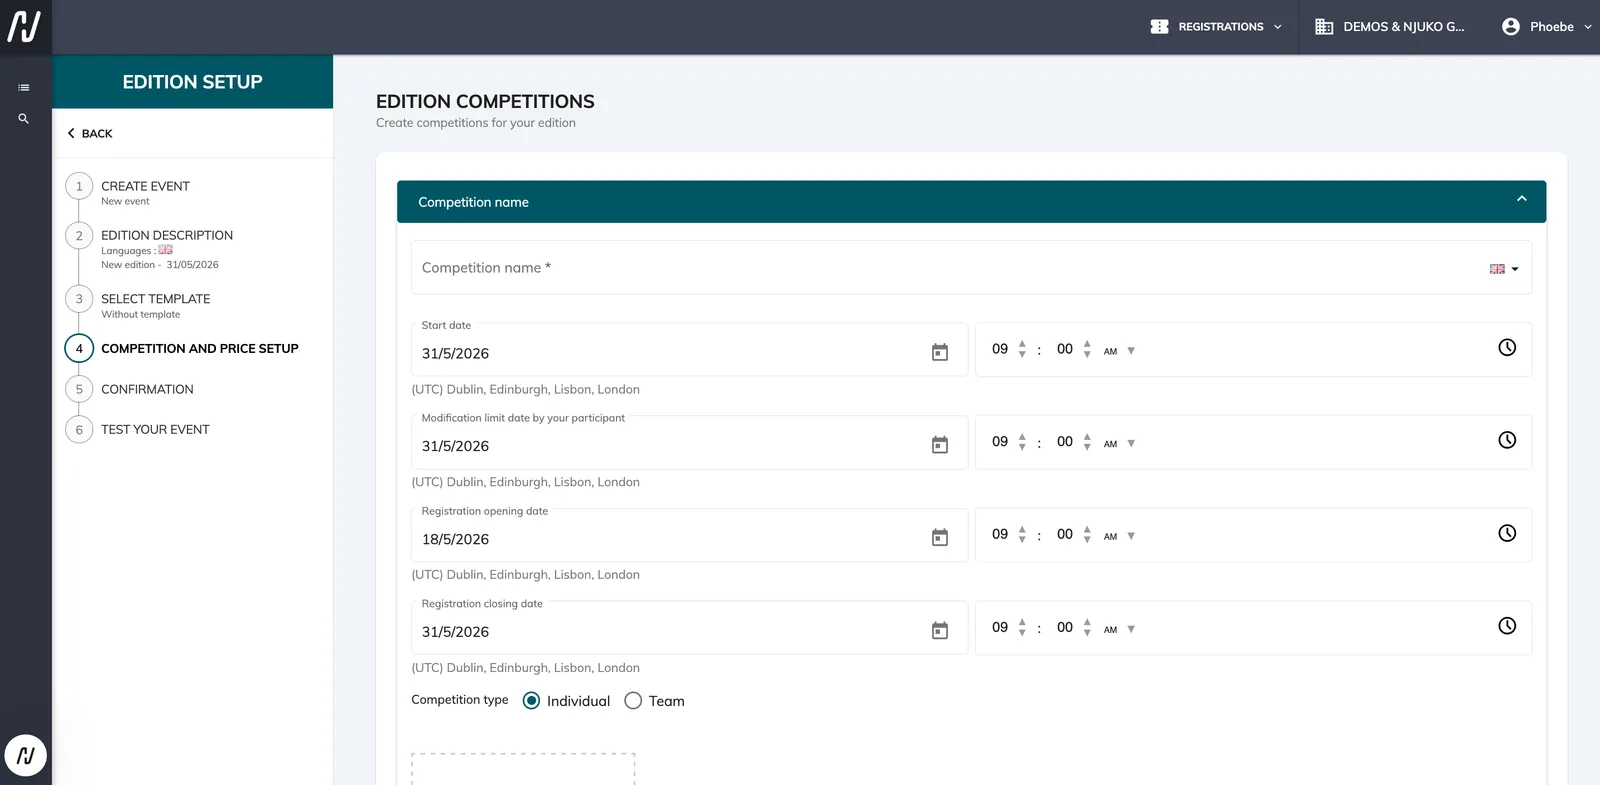
When creating your first competition in step 4, you will be asked to complete several core settings.
5.1 Competition information
For each competition, configure:
Competition name
The participant-facing name of the competition.
Start date
The date and time of the competition.
Modification deadline
The deadline after which participants can no longer modify their registration (if modification workflows are enabled).
Registration opening date
When registrations become available.
Registration closing date
When registrations stop being accepted.
Competition type
Choose:
-
Individual
-
Team
Price
Add at least one registration price for the competition.
You can configure additional pricing options later if needed.
💡 Tip
Many organisers begin with a basic competition setup and refine restrictions, pricing, and workflows afterwards.
6. Explore the Store and install modules
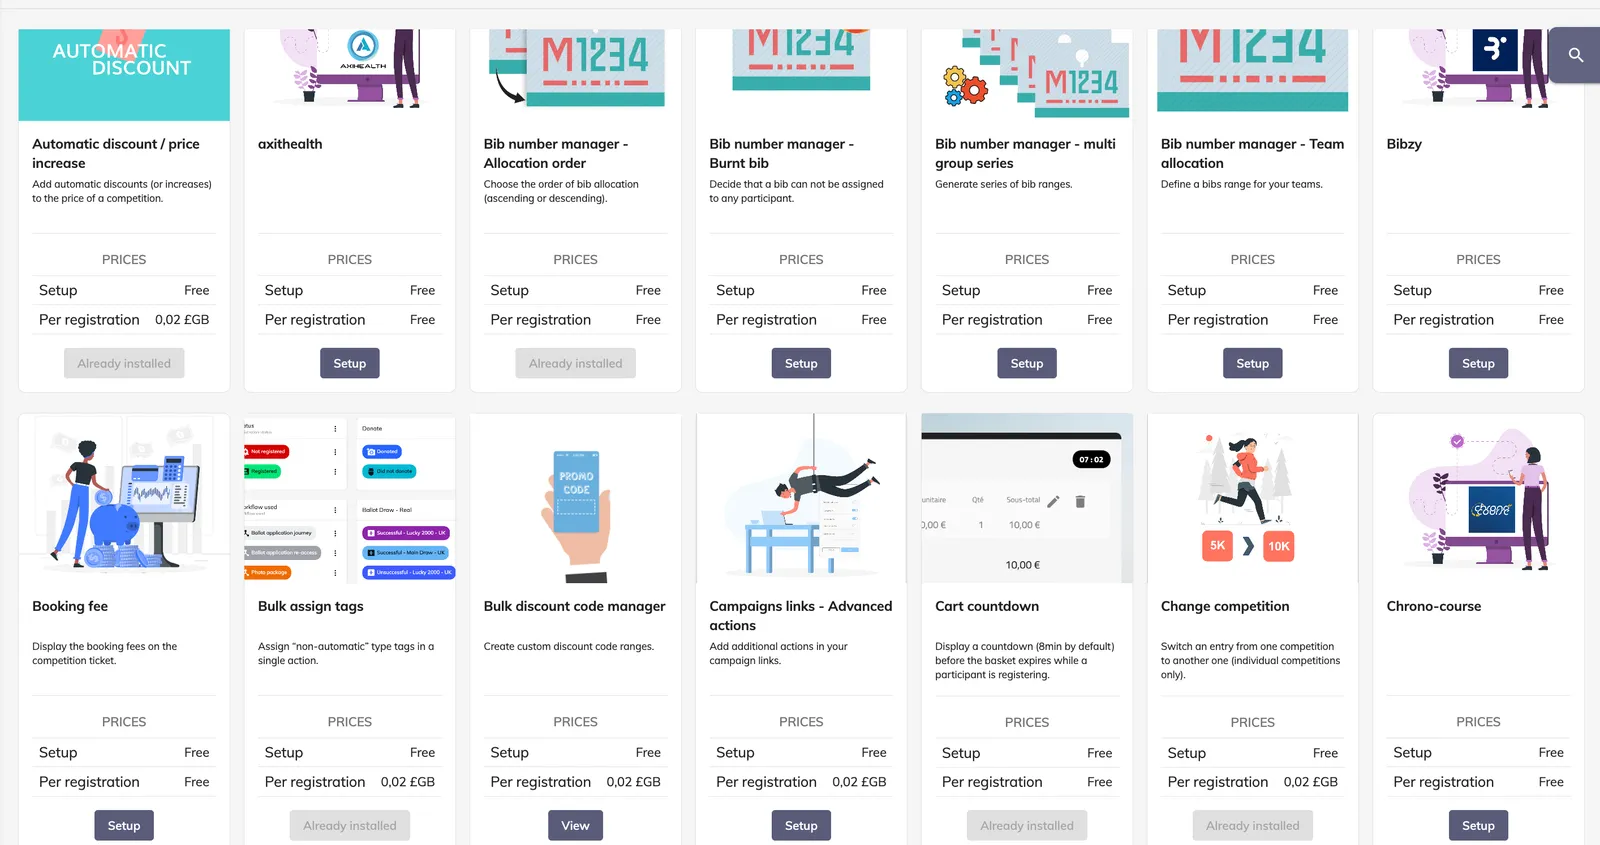
If you create your edition from scratch, we recommend visiting the Store before beginning detailed configuration.
Go to:
Applications menu → Store
The Store is where you can explore and install additional functionalities called modules.
Modules allow you to extend your edition with features tailored to your event needs.
Examples include:
-
Teams and groups
-
Waiting lists
-
Fundraising tools
-
Custom branding
-
Transfers
-
Advanced workflows
-
On-site tools
-
Partner integrations
Some modules are free, while others have an additional cost.
💡 Tip
You only pay for the features you need.
Clicking on a module will display:
-
Feature description
-
Configuration guide
-
Pricing (if applicable)
-
Installation button
👉 Related article:
**Understanding the Store**
7. Begin configuring your edition
Once your edition and modules are ready, you can begin setup.
Typical configuration areas include:
-
Competitions
-
Groups (if used)
-
Registration forms and fields
-
Participant workflows
-
Emails and communications
-
Participant dashboards
-
Waivers and legal information
This Help Centre contains dedicated setup guides for each of these areas.
7.1 Configure competitions
Competitions are the foundation of your edition.
Examples:
-
5K
-
Marathon
-
Kids race
-
Relay
You can configure:
-
Capacity
-
Pricing
-
Restrictions
-
Competition type
-
and more
7.2 Build your registration forms
Forms allow you to collect participant information.
You can:
-
Add fields
-
Create conditional questions
-
Collect documents
-
Configure merchandise or optional purchases
7.3 Configure workflows
Workflows define the participant journey.
This includes:
-
Registration steps
-
Modification journeys
7.4 Configure emails and dashboards
You can also:
-
Create confirmation emails
-
Configure reminders
-
Build participant dashboards
-
Add self-service tools
These areas help improve participant communication and autonomy.
8. Test your edition thoroughly
Before opening registrations, thoroughly test your setup.
We strongly recommend creating multiple test registrations.
While your edition remains in draft mode, test entries are free.
Use this opportunity to test:
-
Registration flow
-
Competition logic
-
Pricing
-
Emails
-
Forms
-
Participant experience
-
Payment behaviour
⚠️ Important
Testing is an essential part of preparing your edition and remains the organiser’s responsibility.
9. Set your edition live
Once testing is complete, you can make the edition live.
Go to:
Setup → Edition status
and update the edition status.
When an edition is set live:
-
Registrations open
-
Participants can begin registering
-
Test mode ends
⚠️ Important
When an edition is made live, all test data is permanently removed from the system.
This includes:
-
Test registrations
-
Applications
-
Teams
-
Groups
Make sure testing is complete before proceeding.
9.1 Payment gateway verification
If you are using:
-
A newly configured payment gateway
-
A new currency
-
A recently integrated payment method
we strongly recommend performing a real payment test once the edition is live.
You could use:
-
Discount codes
-
Low-value entries
to perform a small verification payment.
This helps confirm:
-
Funds are collected correctly
-
Payment routing works as expected
-
Your account receives transactions successfully
⚠️ Important
Live payment testing is particularly recommended when launching a new payment setup.
Related articles
Creating your first edition is the foundation of your event setup and the starting point for building your participant experience.
If you need help configuring your edition or choosing the right setup approach, our team will be happy to help.