
Manage your individual bib numbers
Answers and advice for managing your bib numbers.
1. How to create an individual bib range
In your edition, go to Registrations > Bibs > Bib numbers > Add a new bib range.
1.1 Bib settings
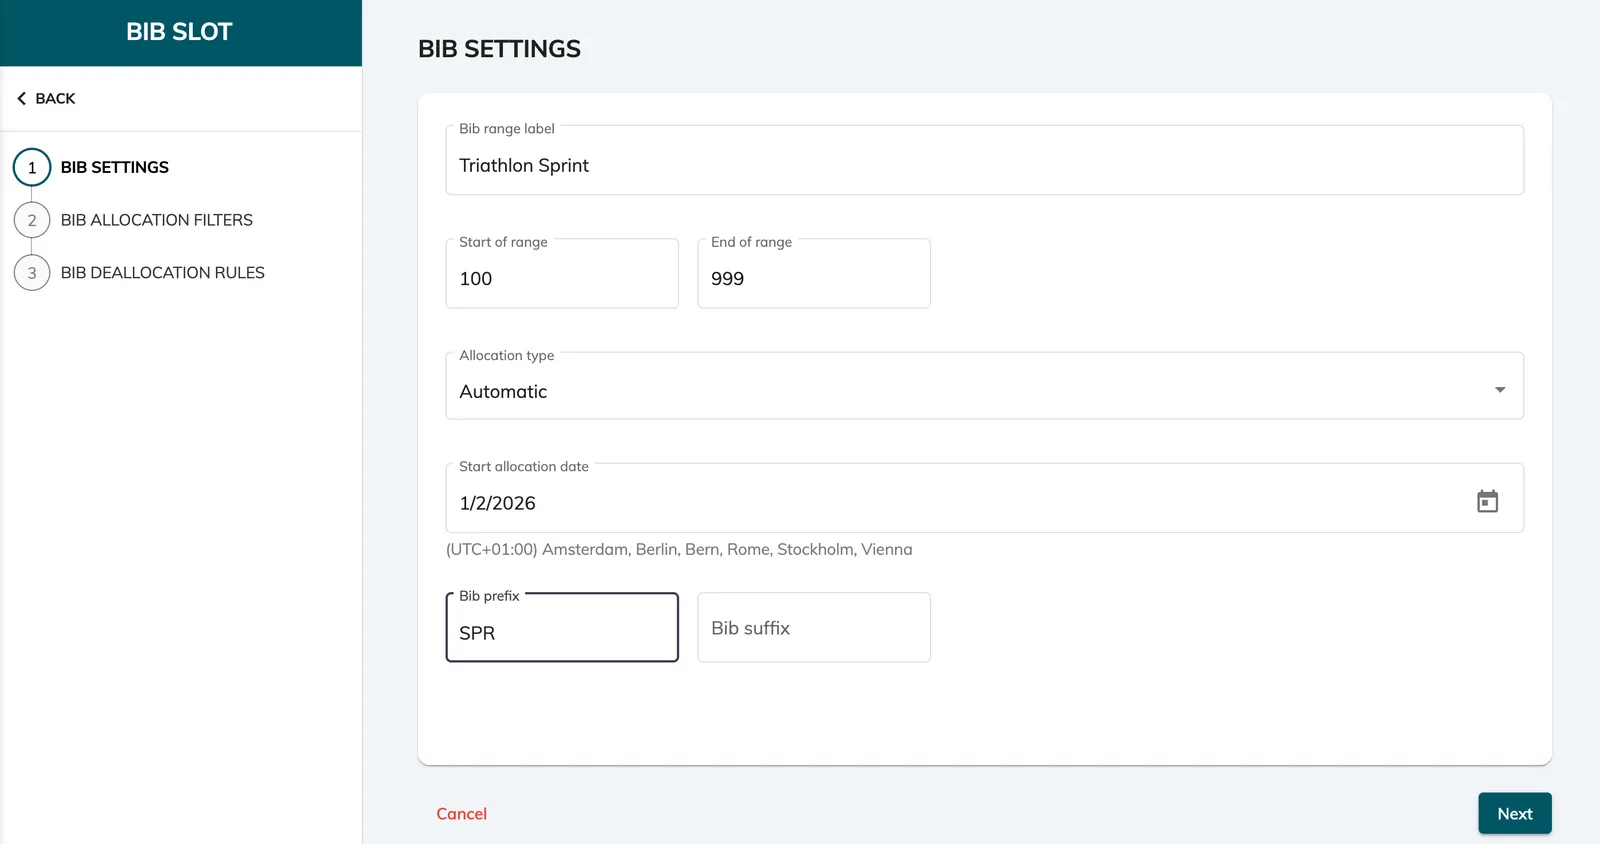
Add your bib range label, define the start and end of your range, choose for it to be an automatic or manual allocation, add a prefix or suffix if desired.
1.2 Bib allocation filters
In the allocation filters step, define who the bib range will be applied to. This is where you can filter it based on a competition, a rule or a tag for example.
1.3 Bib deallocation rules
In the deallocation rules step, select which bib deallocation rules will be applied for this bib range. You’ll need to have configured your deallocation rules beforehand.
2. Bib deallocation rules
Go to Registrations > Bibs > Bib deallocation > Add a new rule.
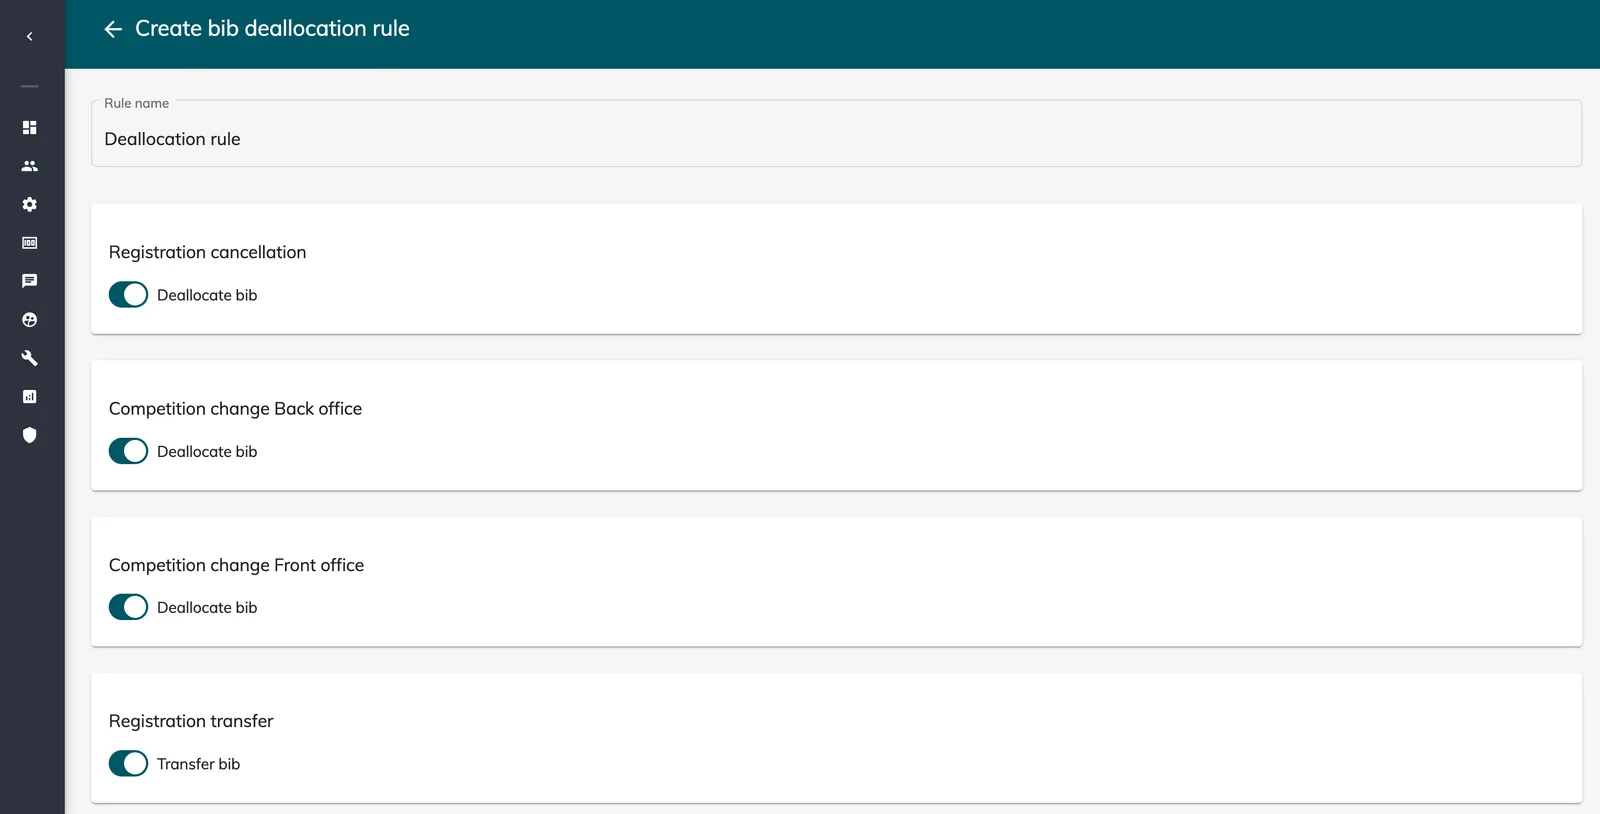
Name your rule.
Define when a bib number will be deallocated, you can select the following circumstances:
-
registration is cancelled
-
registration has been moved to another competition from the back office
-
registration has moved to another competition from the front office
-
registration has been transferred to someone else
3. Importing bib numbers to registrations
Before importing the numbers to your registrations, make sure you have created the bib range associated to these numbers.
Then, go to Bibs > Bib import > click on Import bib numbers.
Add a label to your import.
Select the bib range you’ll be using.
Upload your Excel file and make sure it has:
-
No column headers, no spaces in the cells
-
Column A: booking references
-
Column B: bib numbers