
How to create merchandise forms
How to create a merchandise form, add commercial fields into it and share it with your participants.
Are you looking to sell race T-shirts, hats, hoodies or other items in your forms? Here is a detailed guide on how to create a nice looking merchandise form and share it with your participants.
1. Which field types to use
In a merchandise form, you can use many types of fields, such as:
-
Radio button field or dropdown menu: the participant can select only one option
-
Checkbox field or advanced multi-select: the participant can select one or multiple options
-
Marketing opt-ins: add a field with several questions and several answer choices
-
Shop field: add a paid option
-
Donation field: add an option to make a donation
-
Text field or text area: the participant can write a response to a question
-
Content field or accordion: display custom content and/or images
-
Carousel field: display images or videos
2. Creating your merchandise form
As part of the registration journey, or after registration via emails and dashboards, you can offer your products to your participants:
-
either by using fields in an existing form
-
or by creating a dedicated merchandise form for your products
To create a new form, go to:
Setup > Forms > click on Add form > name the form and choose the role ‘additional form’.
2.1 Adding a shop field
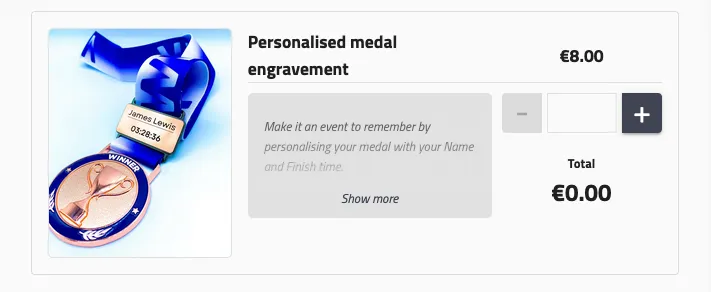
In your form, add a new basic field, choose a shop field. If shop field isn’t an option for you, you may be missing the module so just head to the store to install the shop field module.
Edit your field:
-
add the label
-
choose to hide or display the quantity
-
adjust your visibility settings to define which competitions see this field, and if it’s required or not
-
in the advanced settings tab, click on ‘Commercial mode’ and activate it - add a description of the item, and add a photo if you have one
-
in the settings tab, define your price, the available quantity (if applicable), the minimum and maximum quantities available to select
2.2 Adding a select field
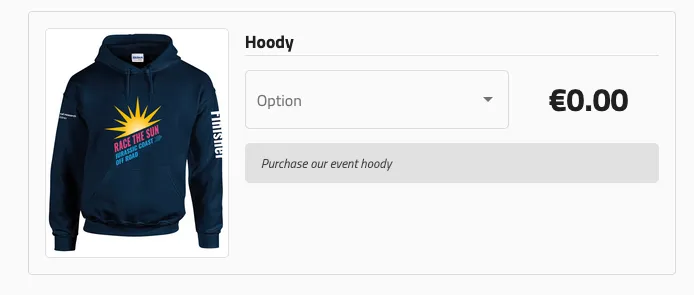
In your form, add a new basic field, choose a select field.
Edit your field:
-
add the label
-
add your options with their prices and quantities
-
adjust your visibility settings to define which competitions see this field, and if it’s required or not
-
in the advanced settings tab, click on ‘Commercial mode’ and activate it - add a description of the item, and add a photo if you have one
3. Sharing your merchandise form post-registration
If you would like to direct your participants to your merchandise form after they have registered — via email and/or their participant dashboard — you can easily do so.
3.1 Create a modification workflow dedicated to your merchandise form
Go to:
Setup > Workflow > Add workflow
Name your workflow and select Post registration workflow.
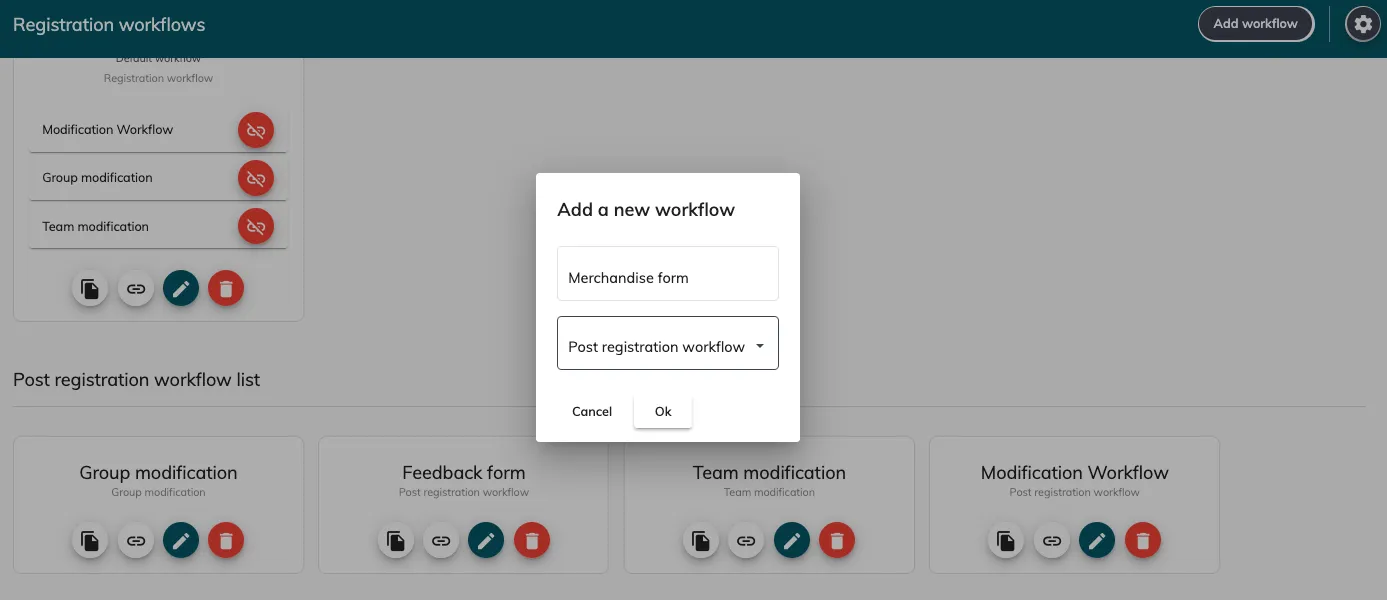
Edit this workflow by clicking on the pencil icon.
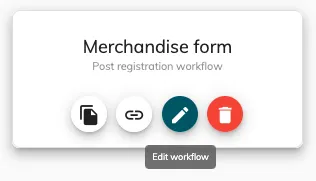
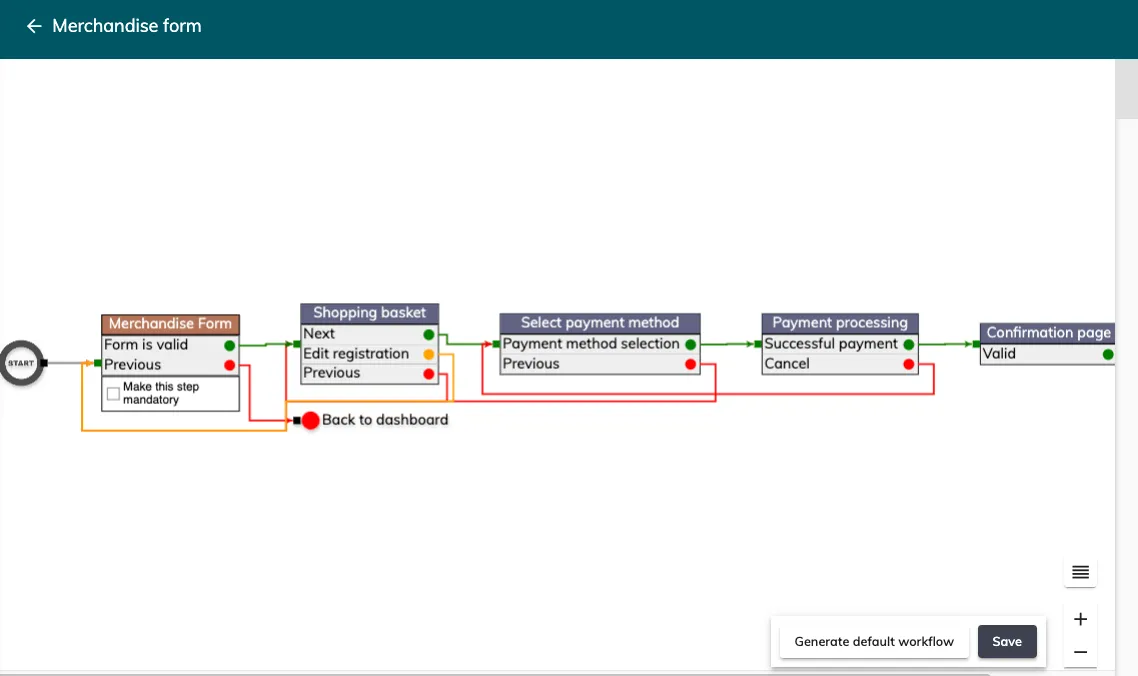

Then add the Merchandise form to this workflow as shown below.
3.2 Send your participants to the merchandise form via email
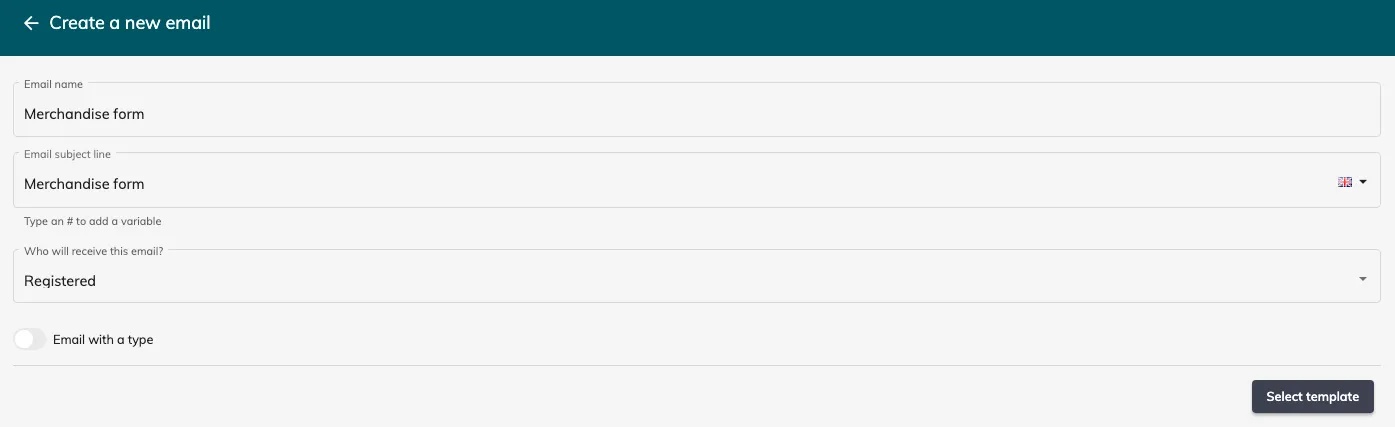
Go to:
Communication > Emails > Create a new email with no type
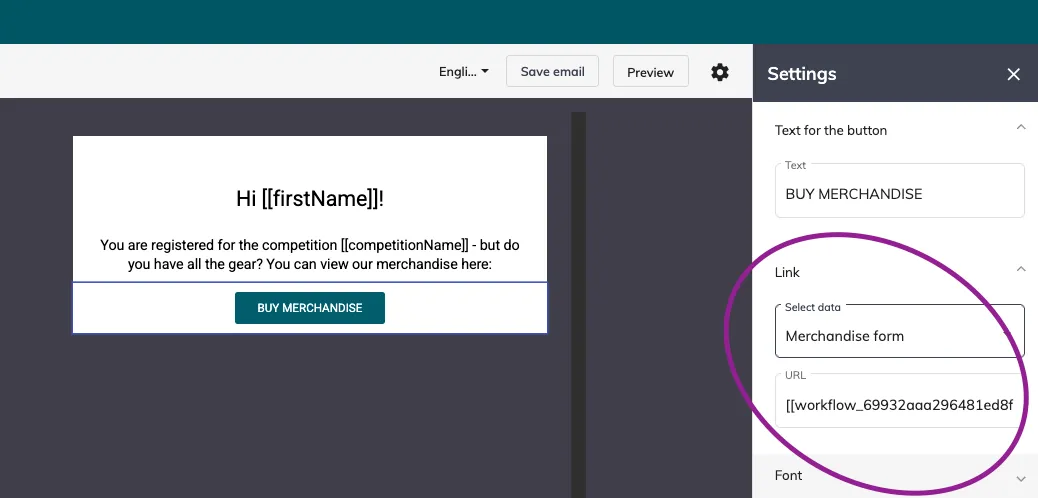
In this email, add a button linking to the workflow you just created:
All that’s left to do is send the email to your participants!
3.3 Send your participants to the merchandise form via the participant dashboard
Copy the URL of the workflow you created:
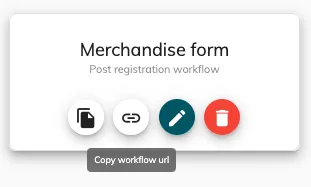
Then go to:
Tools > Dashboards > Participants > Edit dashboard
Add a ‘Custom content’ widget.
In the settings tab, add:
-
the title
-
the content
-
the button name
-
paste the workflow link into the ‘button link’ box
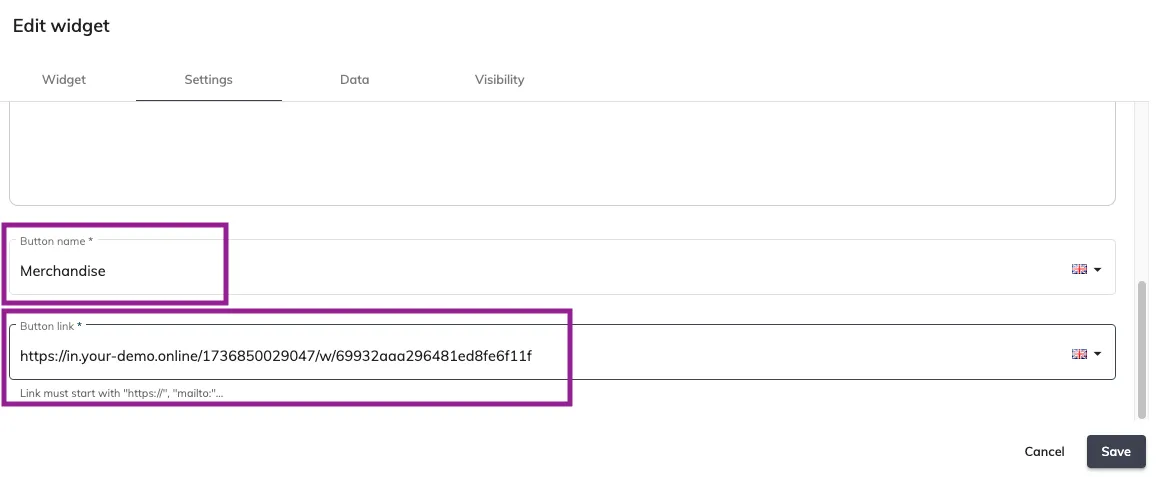
Your participants will then be able to access the merchandise form directly from their dashboard.